RDMC Creation Guide
This guide explains how to create an RDMC container, upload artifacts, and fill in the manifest file. Each step introduces key concepts and allows users to provide or modify their data.
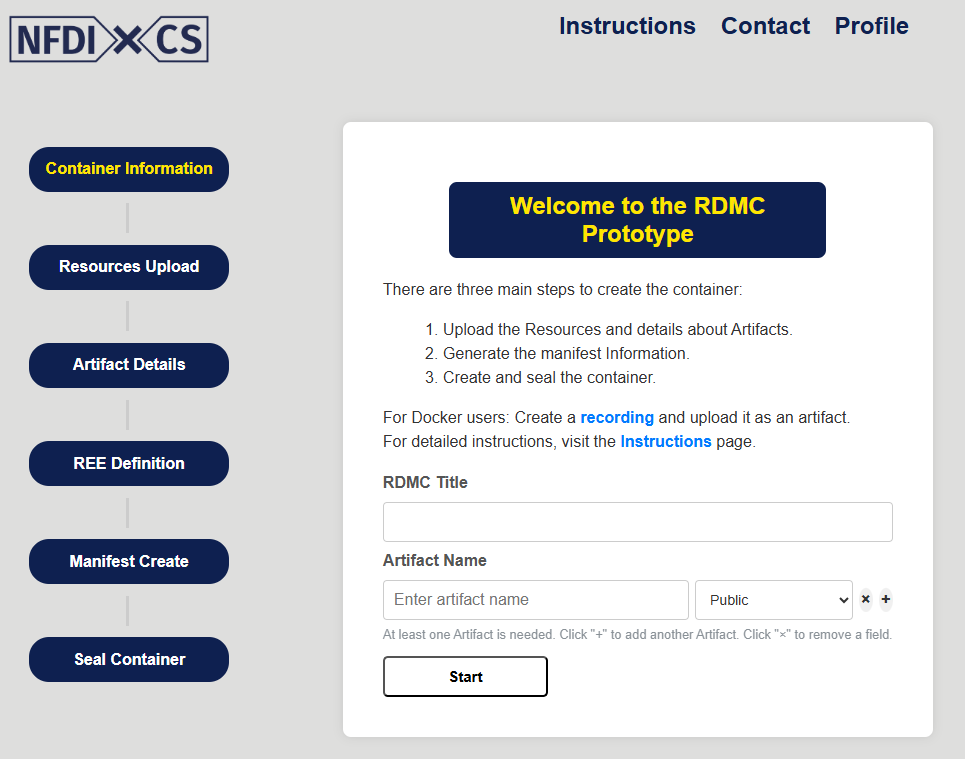
Step 1: Creating an RDMC Container
The RDMC Title is a required field where users specify the name of the container they are creating.
In the Artifacts user will insert the related artifacts name and their respective access level like: Public (accessible to everyone) or Restricted (limited access).
If user wants to add more artifact click [+] or remove any artifact click [x].
Users can modify these details before proceeding to the next step by clicking Start.
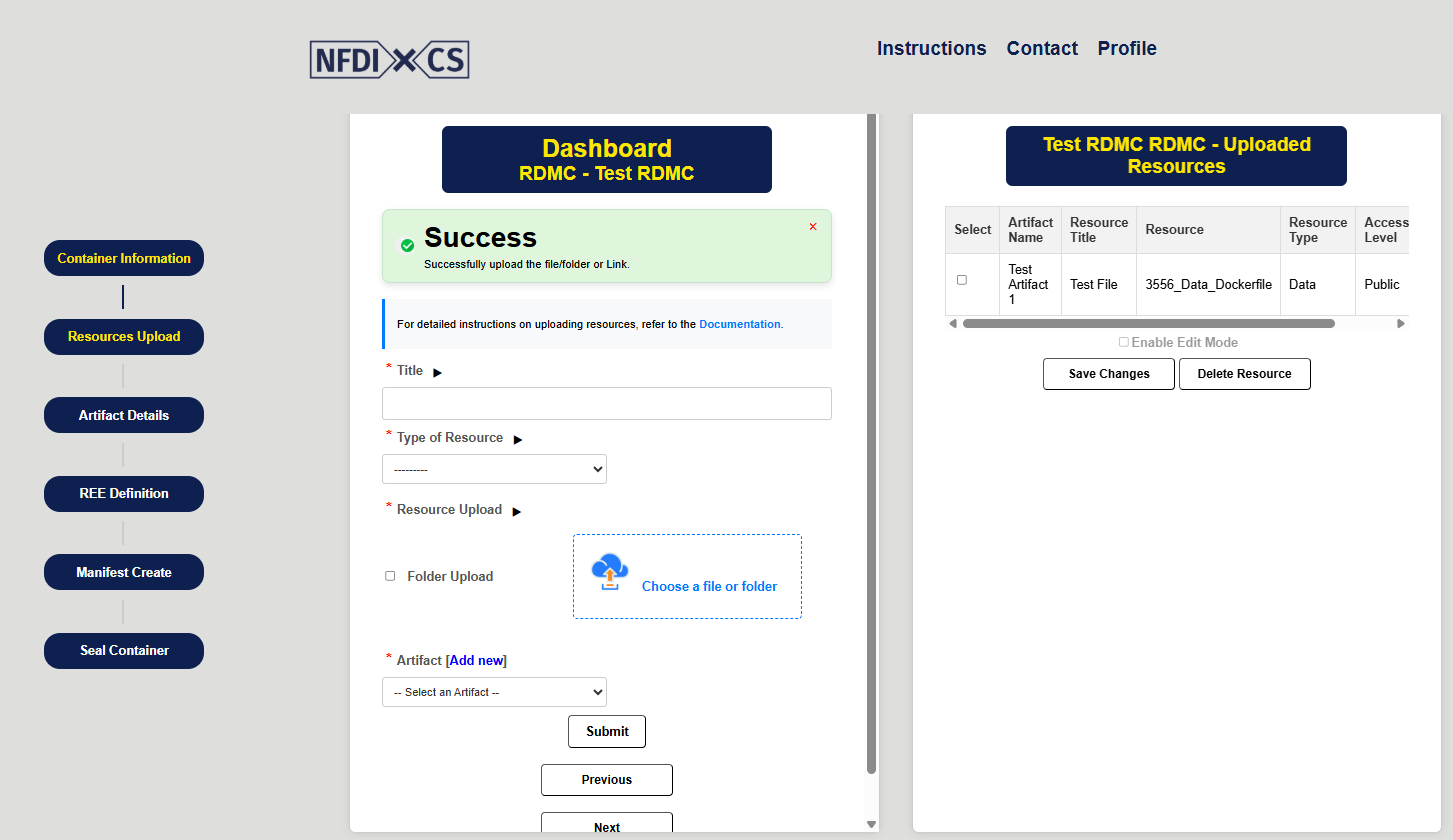
Step 2: Uploading Resource
A valid Title is required to name the submitted resource.
The Type of Resource dropdown allows users to specify the format of the artifact, such as: Link, Data, Software, recording, etc.
- Under the Resource Upload section:
To select a file, click Chose a file or folder and choose the desired file.
If the user wants to upload any folder, then click the Folder Upload checkbox first, then click Chose a file or folder to chose a folder.
The user can review validation results, including any missing required files such as LICENSE or README. Based on these results, the user may choose to cancel the upload and re-submit the folder after making the necessary corrections.
- For Link type resources:
First select Link from Type of Resource, then go to the Insert Link
If the URL is a repository link, first click the checkbox Repository link, and then select the appropriate repository name from the list below.
From the Select Artifact options, user can select the proper artifact, which user already created in earlier step.
- In the Relations section:
Specify the Relation Type to define how the resource is related to the artifact.
Note
Users can modify the details after submitting resources. Uploaded items are listed and can be reviewed or deleted.
If the user successfully uploads the file, link, or artifact properly, a success message will be shown. If there are any errors, an error message will be displayed.
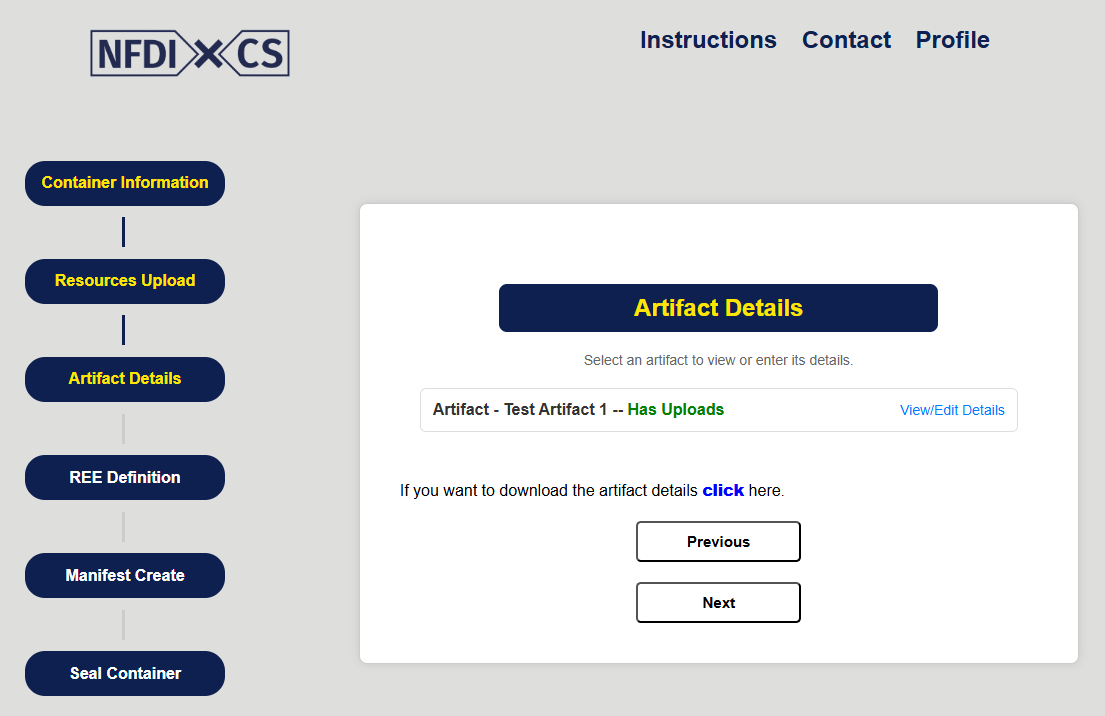
Step 3: Artifact Details
User can see all the available artifacts name and a button view / edit for insert details about artifacts.
When user click the button a popup window will open with some question about the artifact.
User have to fill the questions and click the save button.
Do the same procedure for all others artifacts.
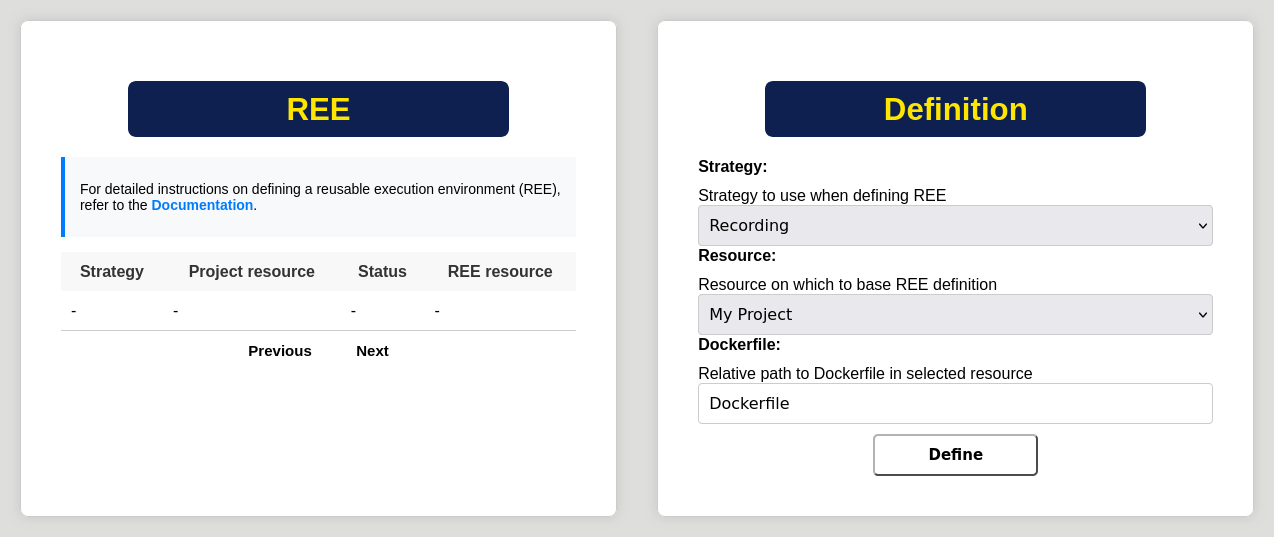
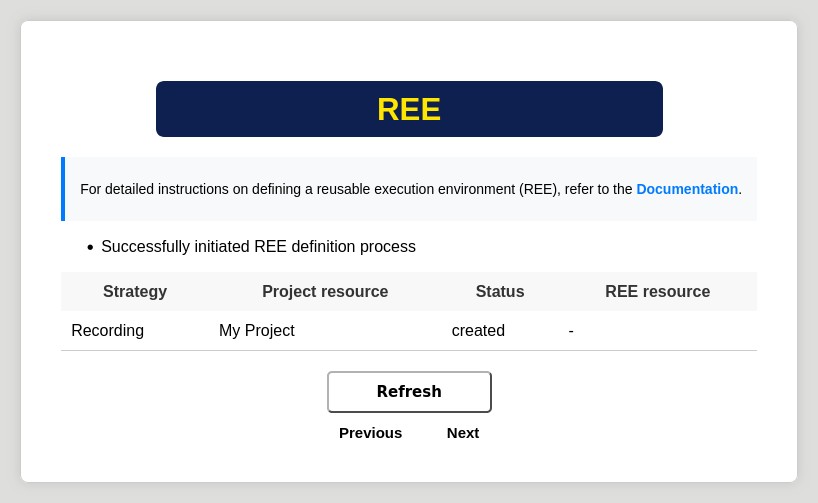
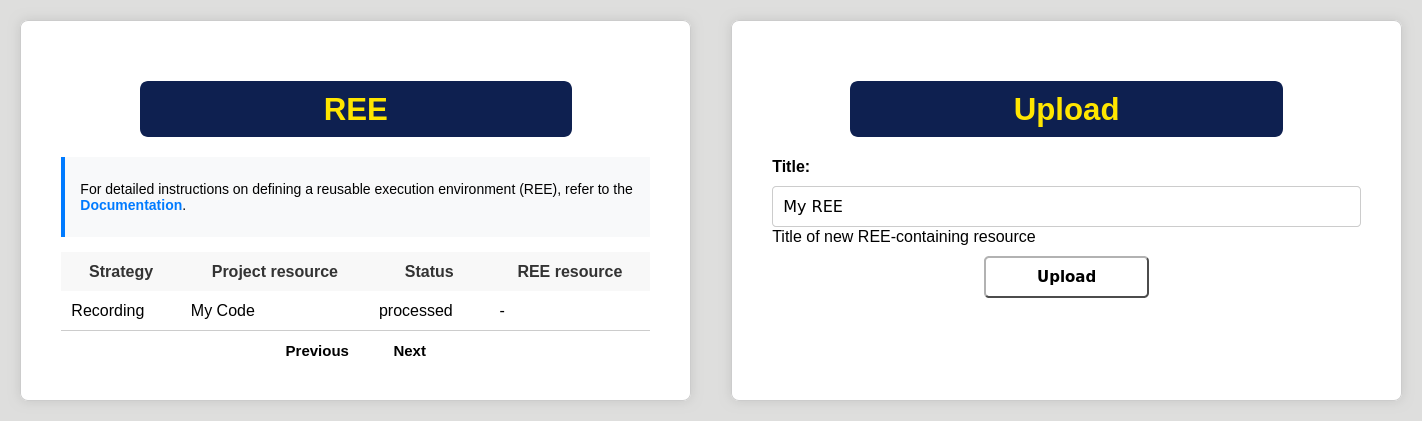
Step 4: REE Definition
Select strategy to use for defining the REE.
Select resource which will be used to define the REE.
Start the definition process by clicking the “Define” button.
Click “Refresh” button until the “Status” column reads “processed”.
Enter title for new resource that will contain the REE.
Click “Upload” button to upload the REE resource to the RDMC.
Strategies
Recording: Create a recording of a Docker build process. Requires that the selected resource contains a Dockerfile and that it is based on a suitable base image.
Software Bill of Materials (SBOM): This strategy is planned but not yet available.
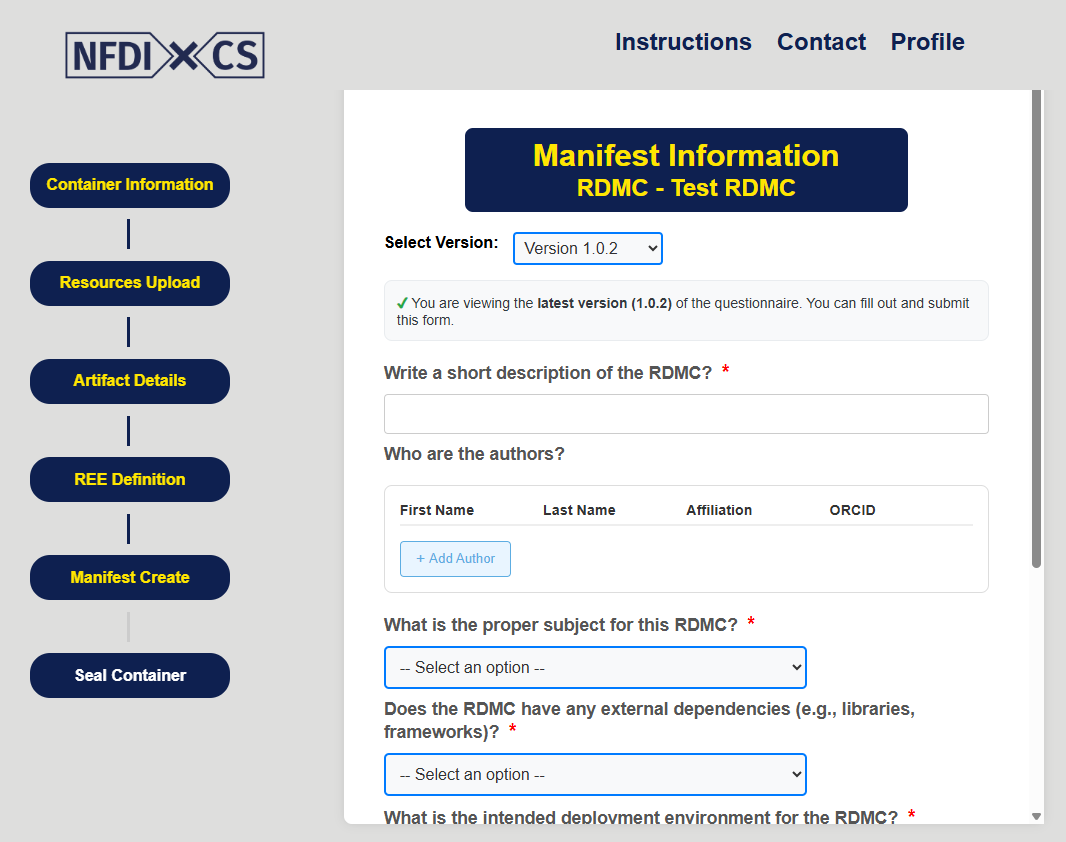
Step 5: Filling the Manifest Information
Select the latest version of the manifest questionnaire by using Select Version. User can see the other versions but not able to fill them.
Fields marked with (*) are required and must be filled in before proceeding.
Users must provide information such as ownership details, primary purpose, and technical requirements.
Selected options can be modified before final submission.
Note
Users can modify the answers after submitting the questions answer.
If the user successfully fill the questions properly, a success message will be shown. If there are any errors or same answers are uploaded again, an alert message will be displayed.
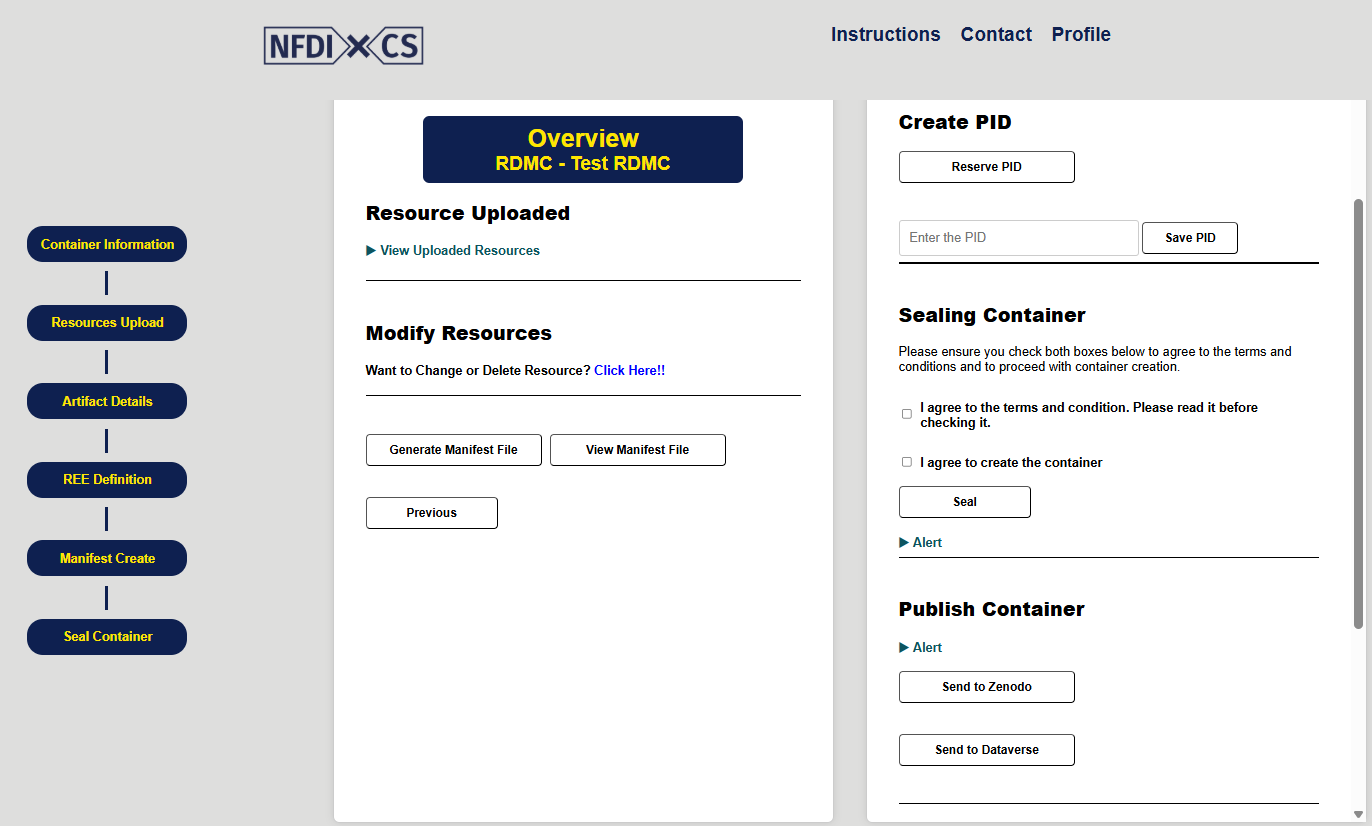
Step 6: Overview and Seal the Container
Overview (Left Side)
Resource Upload - see the uploaded artifacts
If user want to modify or delete any artifacts go to Modify Artifacts section and click the link.
To generate the manifest file click Generate Manifest File button.
To view the manifest file click View Manifest File button.
Final Step (Right Side)
After clicking the Generate Manifest File button, the Download Manifest section will display an option to download the manifest file..
To create the container click the checkboxes and click the Create button.
- Under the Send Container section, the user has three options for handling the finalized container:
Download Locally – Save the container to a local machine.
Send to Zenodo – Upload the container and manifest file directly to Zenodo.
Send to Dataverse – Upload the container and associated metadata to a connected Dataverse repository.
Clicking the Done button the process will end.